In my home lab environment, I find it convenient (most of the time) for my devices to be able to communicate with one another unimpeded. Doing so allows for simple file transfer, to use RDP, or to ping virtual devices. Often these capabilities are not a necessity, but they do make things convenient. And, in my mind, the lab is for rapid testing and learning – not for toiling over simple tasks. It should be noted that it is important to understand the security implications of allowing unimpeded communication between your devices, and this should only be done in a secure environment. Caution should be exercised here.
I’ll be using Hyper-V, as it is the virtualization platform I am most familiar with. Although, I should give honorable mention to VMWare, because I find their virtual network scheme to be much more intuitive – so much so, in fact, that it helped me in troubleshooting my virtual network configuration using Hyper-V.
Let’s get started- in Hyper-V, navigate to Virtual Switch Manager from the Actions pane in Hyper-V Manager.

We’re going to configure an external switch that shares your network adapter by using a bridged connection. Select New virtual network switch, select External, and press Create Virtual Switch.
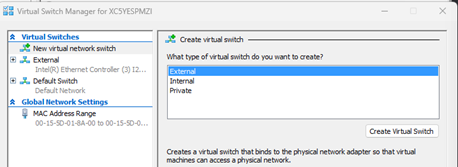
In Virtual Switch Properties, select your desired network adapter from the external network drop-down menu and be sure to check the Allow management operating system to share this network adapter box. This allows for the VM to share the network adapter of the host machine by using a bridged connection. If we were not to do this, a device using this switch will not be given its own internal IP by the DHCP server, because it will effectively be viewed as the same entity.
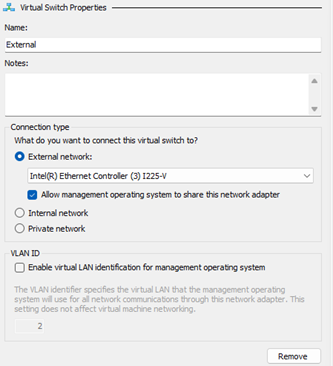
If a bridged connection is not being used, you will notice that the host machine will infer the improper DNS suffix when resolving the hostname, and the IP will be in the improper range. To check this, I would use a quick ping of the VM from the host – BUT, default Windows settings will not allow ICMP traffic.
To fix this, navigate to your Windows Defender Firewall settings and select Allow an app or feature through Windows Defender Firewall.
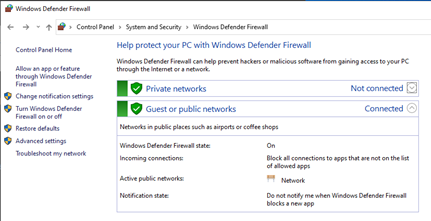
Check the boxes for File and Printer sharing. And, while we are here, scroll down to Remote Desktop and check those boxes as well.
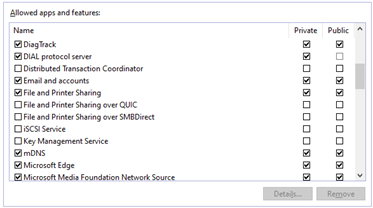
In Windows 11, Remote Desktop now has its own settings menu under Settings > System > Remote Desktop. Be sure Remote Desktop is enabled.

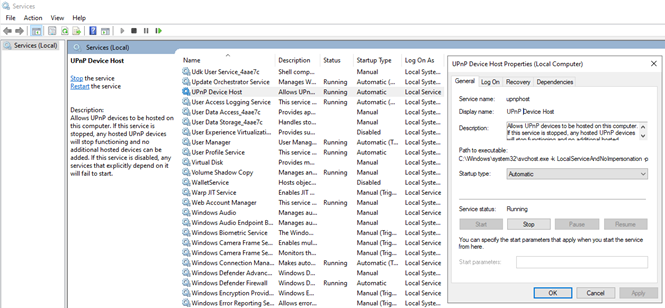
I also want to enable network discovery. To enable network discovery, open Run using the hotkeys Win+R, and enter “services.msc”. Enable and start the following services, and set their startup type to Automatic: DNS Client, Function Discovery Resource Publication, SSDP Discovery, and UPnP Device Host.
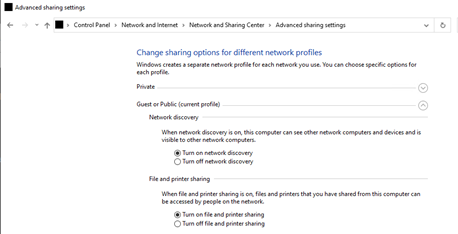
Finally, in Control Panel, enable Network discovery and File and printer sharing.
